Procedure for Disinfection of the Well and Water System
The following procedure is for a well that has a submersible pump with either a removable well cap or a well seal with a threaded plug in it.
See STEP 4 to determine whether you have a well cap or a well seal.
If the well has a sanitary seal, this procedure can only be attempted if a removable threaded plug in the sanitary seal allows access into the well.
STEP 1 - Isolate critical water system components
Plumbing By Pass
►Bypass water softeners and other water system components, such as the dishwasher and the washing machine, that may be damaged by chlorine prior to initiating this well disinfection procedure.
Since water softeners, water filters, and other water treatment or water using devices may harbor organisms, it will be necessary to separately disinfect the softener and other devices.
Water treatment devices should be disinfected separately according to the information provided by the manufacturer or water conditioning contractor.
If this information is not available, see the section on disinfecting water treatment equipment and water using devices at the end of this fact sheet.
►Turn off and drain the water heater. Use caution to avoid scalds or burns. Follow procedures as described by the manufacturer or plumber.
STEP 2 - Mixing a chlorine solution
This table indicates the amount of laundry bleach (6.0 percent sodium hypochlorite or 5.7 percent available chlorine) that should be used for well disinfection.
Sodium hypochlorite is the disinfectant found in laundry bleach and is the recommended product for well disinfection.
Since bleach loses its disinfecting capacity over time it is important that a fresh container be used.
Do not use laundry bleach that contains any fragrance or other additive.
►Place a large clean bucket near the well. Add 1 gallon of water and the amount of bleach indicated in the table and mix thoroughly.
For wells greater than 100 feet deep or with well casing diameters greater than 6 inches, mix the bleach with 2 gallons of water.
For wells greater than 200 feet deep or with well casing diameters greater than 6 inches, increase the amount of bleach proportionately.
After this solution is poured into the well, it will provide a chlorine concentration of at least 50 parts per million.
WARNING:
If your well has not been disinfected for many years, it may have considerable scale built up.
Disinfecting with a strong chlorine solution can dislodge this scale and plug or damage your pump,
and/or cause problems elsewhere in the plumbing system.
You may wish to begin with a weaker solution of chlorine. If the water runs red or brown, pump it out on the ground surface without recirculating it back into the well as described in STEP 6.
Once the color gets lighter, mix a new chlorine solution batch as described in STEP 2 and begin the process again.
In situations where an initial disinfection has not worked, where there is considerable iron or other solids in the well, or where there is a significant nuisance bacteria problem, a more concentrated chlorine solution may be used.
Multiply the quantities of chlorine listed in the table by four and mix with 4 gallons of water (for example, a 4-inch diameter well that is 51-100 feet deep would need 4 cups of bleach mixed with 4 gallons of water).
This will provide a chlorine concentration of at least 200 parts per million in the well and water system.
NOTE: Too strong a chlorine solution will reduce the effectiveness of disinfection.
If the chlorine concentration greatly exceeds 200 parts per million, it can actually make the water too alkaline and reduce the effectiveness of the disinfection process.
STEP 3 - Electrical safety
Electric Panel
►Turn off electrical power to the pump by turning off the circuit breaker or unscrewing the fuse.
If the breaker or fuse box has a “lockout” hasp to prevent someone from accidentally turning on the water pump circuit breaker, use it.
Power should not be turned back on until STEP 6 or after the chlorine solution has been placed in the well.
STEP 4 - Opening the well
Step 4 - 1
Do not place well components directly on the ground.
Determine whether your well has a well cap or a well seal.
A well cap overlaps the top of the well casing and is held in place with bolts or set screws.
A sanitary seal fits tightly within the very top of the well casing.
Only a professional should remove a sanitary seal.
If a well has a well cap, the discharge pipe from the well is usually underground.
If the well has a well seal, the discharge pipe from the well is usually through the top of the well.
If you are unsure as to whether your well has a well cap or a well seal, you should seek professional advice.
With electrical power off, open the well.
Step 4 - 2
►If your well has a well cap, remove the bolts along the outside edge of the top of the well cap for newer models, or loosen the set screws on the side of the cap for older models and lift off the cap.
Gently lift the wires/wire nuts out and pull to the side. Do not pull on the release cable or pull the
pipe for the pitless adapter and pump. Check for damaged wires/wire nuts. Be careful not to loosen any connections.
Discharge Pipe ►If your well has a well seal with a threaded plug, you can remove the plug and pour the chlorine solution through the hole.
If there is no threaded plug in the well seal, you should have the well disinfected by a licensed well contractor or licensed pump installer.
The well seal has bolts that compress the seal. Loosening the bolts too far may cause a portion of the seal or the pump to fall into the well.
Do not remove or loosen the bolts. Do not remove the well seal.
STEP 5 - Adding chlorine to the well
Step 5
►Pour the mixture into the well and avoid spilling on any wire connections. A funnel should be used for pouring the chlorine solution into small openings.
Be careful not to splash/spill the concentrated solution.
Wear gloves and goggles.
Do not use a siphon.
STEP 6 - Recirculating chlorinated water
Step 6
Recirculating the chlorinated water mixes the water column thoroughly and distributes the chlorine.
It helps to wash down the inside sidewalls of the well casing, pump wires, and drop pipe.
►Turn on the power to the pump.
►Connect a clean garden hose to a nearby yard hydrant or an outside faucet. Run the water out of the hose in an area away from the well for approximately 10 minutes until the water runs clear.
You may notice that the water coming from the garden hose turns red, yellow, or brown.
This is due to the chlorinated water precipitating iron from the water.
The chlorinated water may also dislodge scale or rust from the sides of the well casing.
Scale, iron, manganese, or other precipitated minerals may form when the chlorine is added to the system.
These solids can cause clogging of faucet aerators, valves, water solenoids, and equipment using filters.
Run the water out on the ground until the water runs clear.
Additional chlorine solution may need to be added to the well.
Do not run discolored water through the household plumbing, and do not run it into a septic system.
Since a strong chlorine solution may harm vegetation, dispose of the chlorinated water away from sensitive plants.
Do not discharge water into a lake or stream as this may harm aquatic life.
►When the water coming from the garden hose is relatively clear, turn the water off, place the garden hose into the top of the well casing and run water into the well.
After the chlorine smell is first detected from the garden hose, recirculate the water back into the well for about two hours.
You can use chlorine test papers, such as those commonly used to check the chlorine in swimming pools, to provide a visual indication that chlorine is present.
►Turn off the power to the pump. Remove the garden hose from the well casing and replace the well cap or threaded plug in the well seal.
STEP 7 - Bringing chlorinated water to each faucet
Test Paper
► Turn on the power to the pump.
Run chlorinated water through the entire plumbing system by running water to each fixture* one at a time until you smell bleach (or use chlorine test papers available at pool supply businesses) and then close the fixture.
Do this for each fixture, including:
Cold and hot water faucets.
Toilets and shower/bath fixtures.
Any outside faucets or yard hydrants.
*Faucet aerators may need to be removed if clogging occurs from precipitated iron or loosened scale.
►Leave the chlorinated water in the system a minimum of two hours and preferably at least six hours or overnight.
WARNING:
Chlorine can cause eye damage and skin irritation.
In addition to not using the water for consumptive purposes, all potential water users need to be warned that a potentially dangerous concentration of chlorine is in the water system.
Do not shower/bathe with water containing high levels of chlorine. You may wish to place a pail or bag over each faucet as a reminder.
STEP 8 - Removing the chlorinated water
►Run a garden hose from an outside faucet or yard hydrant to flush the chlorine out of the system.
It can take 30 minutes to 24 hours or more to flush all of the chlorine from the well.
Do not run the chlorinated water into your septic system as this can kill many of the beneficial bacteria in the system.
Also, the amount of water required to flush the well may hydraulically overload and damage the septic system.
Since a strong chlorine solution may harm vegetation, dispose of the chlorinated water away from sensitive plants. Do not discharge water into a lake or stream as this may harm aquatic life.
►Once the chlorine is gone from the well, open up each fixture one at a time until the chlorine smell is no longer present.
This will purge the remaining chlorine from the water system.
It should take just a few minutes to flush out the chlorine from the cold water lines.
The hot water faucets will have to be run longer.
In some cases, it may be quicker to drain the water heater(s) again. The small amount of chlorinated water flushed from the water pipes can be run into a septic tank.
STEP 9 – Reconnecting water softeners and other water treatment devices
►Return bypass valves to “on” or “service” position after following the manufacturer’s directions to disinfect these devices.
►Refill the water heater if applicable.
►Start the water heater.
STEP 10 – Testing your water
Test Your Water Make sure the chlorine has been removed from the water system.
It is recommended that a sample be collected a couple days after the well is disinfected.
Do not use the water for drinking, cooking, or food preparation until it tests free of coliform bacteria.
Follow the procedure for collecting a water sample given on the first page of this fact sheet.
Procedure for Disinfection of Water Softeners, Water Treatment Equipment, and Water Using Devices
Water softeners, water treatment equipment, and water using devices, such as dishwashers and washing machines, may be damaged by excessive amounts of chlorine.
However, the softener and other devices should be disinfected when there are bacteria problems in the plumbing.
After step 8, follow the manufacturer’s instructions for disinfecting the particular unit you have.
If the disinfection information is unavailable, the following steps can be used, as recommended by the Water Quality Association, a not-for-profit international trade organization representing the household, commercial, industrial, and small community water treatment industry.
For further questions regarding this section, contact the association at 630-505-0160 or visit the Water Quality Association website.
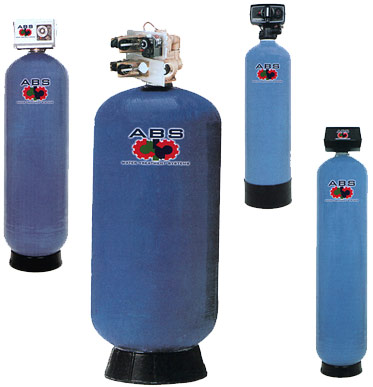
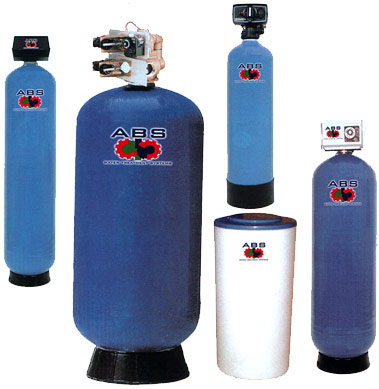
1. Water Softeners
Water Softener
►Keep unit on “bypass” until chlorine is flushed out of the system.
To thoroughly disinfect the softener after all the chlorine is flushed from the system, add one-half cup bleach to the softener’s brine tank and run the unit through a regeneration cycle immediately.
2. Water Filters
Water Filter ►For carbon filters and other cartridge water filters, remove and discard the old filter cartridge.
Wash the sump and head with laundry detergent and bleach and rinse. Insert a new cartridge filter.
►For whole-house carbon tank filters or a water softener that contains carbon, empty the entire media bed.
Thoroughly clean the empty unit inside and out with a laundry bleach and water solution. Re-bed the unit using new carbon or other media/carbon mix.
3. Reverse Osmosis (RO) Systems
Reverse Osmosis System
►Turn off the water supply to the RO unit and open the RO faucet to relieve pressure and drain the RO storage tank.
►Remove and discard the pre- and postfilters and remove the RO membrane element.
Clean and disinfect the filter sumps, the filter heads, and the RO membrane housing and end caps.
►Fill the first prefilter sump with water to within about 2 inches from the top and add 1 ounce (2 tablespoonfuls or 6 teaspoonfuls) of unscented laundry bleach (6.0 percent sodium hypochlorite or 5.7 percent available chlorine); carefully reassemble this first prefilter with the chlorine/water mixture but without its filter cartridge element in place.
►Reassemble all the remaining housings without their membrane element and filter cartridge elements in place.
►Open the water supply to the RO.
Open the RO faucet and allow water to run until you can begin to smell the chlorine bleach.
(If no chlorine bleach smell can be obtained, go back to bullet point three and increase the amount of laundry bleach added until a residual can be maintained throughout the system.)
►Close the RO faucet and allow the storage tank to fill and then remain full for 25-30 minutes.
►Open the RO faucet again and leave it open until the entire chlorine bleach smell is gone. Let the accumulated water in the RO storage tank drain completely.
►Turn off the water supply to the RO. Close the RO faucet after all the pressure has been relieved and the water flow stops.
►Install all new pre- and postfilter elements, using careful aseptic techniques so as to not recontaminate the RO system.
►Reinstall the RO membrane element in its housing. Fill the membrane element housing with water and 1 milliliter (20 drops) of laundry bleach. Reassemble this membrane element, chlorinated water, and housing unit.*
*CAUTION: High levels of chlorine over an extended period of time can degrade polyamide thin film composite (TFC) RO membranes, although significant degradations should not occur in these specified few minutes of chlorine contact time.
►Immediately reopen the water supply to the RO system and reopen the RO faucet. Let water drip from the RO faucet until the chlorine bleach smell has dissipated.
►Finally, close the RO faucet, let the storage tank completely refill, and discard the first full tank of water following the completion of this procedure.


![[MSF+3.jpg]](https://2img.net/h/4.bp.blogspot.com/_SynCnHGx75g/Shl2T3oVhsI/AAAAAAAAAEY/_7oem5pvQ3I/s1600/MSF%2B3.jpg)