Admin
Admin

عدد المساهمات : 3762
تاريخ التسجيل : 15/09/2009
العمر : 57
الموقع : مصر
 |  موضوع: تقييم الشيللرات ميكانيكيا وكيميائيا وتشغيليا موضوع: تقييم الشيللرات ميكانيكيا وكيميائيا وتشغيليا  السبت يوليو 23, 2011 3:29 am السبت يوليو 23, 2011 3:29 am | |
| Chillers
by
coloel.dr
bahaa badr
chemical consultant
Topics:
• Introduction
• Types of Chillers
• Key Components of Mechanical Compression Chillers
• Safety Issues
• Best Practices for Efficient Operation
o Sample Operating Log for Chillers
• Best Practices for Maintenance
o Maintenance Schedule for Chillers
• References
Introduction
Chillers are a key component of air conditioning systems for large buildings.
They produce cold water to remove heat from the air in the building. They also provide cooling for process loads such as file-server rooms and large medical imaging equipment.
As with other types of air conditioning systems, most chillers extract heat from water by mechanically compressing arefrigerant.
Chillers commonly use more energy than any other piece of equipment in large buildings. Maintaining them well and operating them smartly can yield significant energy savings.
Chiller and associated HVAC systems
Types of Chillers
Mechanical Compression
During the compression cycle, the refrigerant passes through four major components within the chiller:
the evaporator, the compressor, the condenser, and a flow-metering device such as anexpansion valve.
The evaporator is the low-temperature (cooling) side of the system and the condenser is the high-temperature (heat-rejection) side of the system.
The refrigeration cycle
Mechanical Compressor Chillers
Mechanical compression chillers are classified by compressor type:
reciprocating, rotary screw, centrifugal and frictionless centrifugal.
Reciprocating:
Similar to a car engine with multiple pistons, a crankshaft is turned by an electric motor, the pistons compress the gas, heating it in the process.
The hot gas is discharged to the condenser instead of being exhausted out a tailpipe.
The pistons have intake and exhaust valves that can be opened on demand to allow the piston to idle, which reduces the chiller capacity as the demand for chilled water is reduced.
This unloading allows a single compressor to provide a range of capacities to better match the system load.
This is more efficient than using a hot-gas bypass to provide the same capacity variation with all pistons working.
Some units use both methods, unloading pistons to a minimum number, then using hot-gas bypass to further reduce capacity stably.
Capacities range from 20 to 125 tons.
Reciprocating compressor
Rotary Screw:
The screw or helical compressor has two mating helically grooved rotors in a stationary housing.
As the helical rotors rotate, the gas is compressed by direct volume reduction between the two rotors.
Capacity is controlled by a sliding inlet valve or variable-speed drive (VSD) on the motor. Capacities range from 20 to 450 tons.
Screw compressor
Centrifugal:
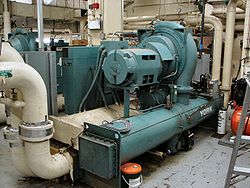
The centrifugal compressor operates much like a centrifugal water pump, with animpeller compressing the refrigerant.
Centrifugal chillers provide high cooling capacity with a compact design.
They can be equipped with both inlet vanes and variable-speed drives to regulate control chilled water capacity control. Capacities are 150 tons and up.
Centrifugal compressor
Frictionless Centrifugal:
This highly energy-efficient design employs magnetic bearing technology.
The compressor requires no lubricant and has a variable-speed DC motor with direct-drive for the centrifugal compressor. Capacities range from 60 to 300 tons.
frictionless centrifugal compressor
Key Components of Mechanical Compression Chillers
Evaporator
Chillers produce chilled water in the evaporator where cold refrigerant flows over the evaporator tube bundle.
The refrigerant evaporates (changes into vapor) as the heat is transferred from the water to the refrigerant.
The chilled water is then pumped, via the chilled-water distribution system to the building’s air-handling units.
The chilled water passes through coils in the air-handler to remove heat from the air used to condition spaces throughout the building.
The warm water (warmed by the heat transferred from the building ventilation air) returns to the evaporator and the cycle starts over.
Compressor
Vaporized refrigerant leaves the evaporator and travels to the compressor where it is mechanically compressed, and changed into a high-pressure, high-temperature vapor.
Upon leaving the compressor, the refrigerant enters the condenser side of the chiller.
Condenser
Inside the water-cooled condenser, hot refrigerant flows around the tubes containing the condenser-loop water.
The heat transfers to the water, causing the refrigerant to condense into liquid form.
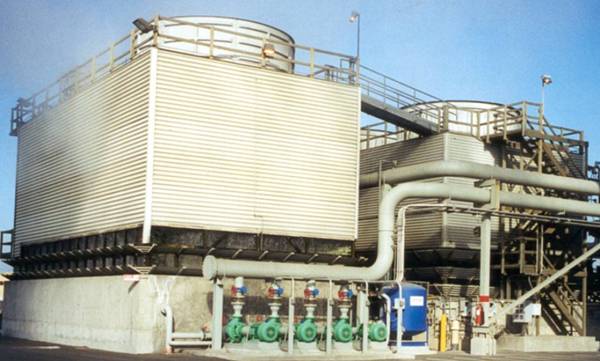
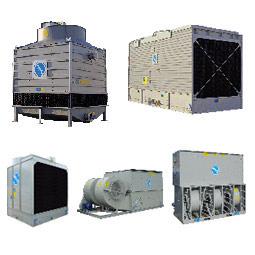
The condenser water is pumped from the condenser bundle to the cooling tower where heat is transferred from the water to the atmosphere.
The liquid refrigerant then travels to the expansion valve.
Expansion valve
The refrigerant flows into the evaporator through the expansion valve or metering device.
This valve controls the rate of cooling.
Once through the valve, the refrigerant expands to a lower pressure and a much lower temperature. It flows around the evaporator tubes, absorbing the heat of the chilled water that’s been returned from the air handlers, completing the refrigeration cycle.
Controls
Newer chillers are controlled by sophisticated, on-board microprocessors.
Chiller control systems include safety and operating controls.
If the equipment malfunctions, the safety control shuts the chiller down to prevent serious damage to the machine.
Operating controls allow adjustments to some chiller operating parameters. To better monitor chiller performance, the chiller control system should communicate with the facility’s direct digital control (DDC).
Safety Issues
Chillers are typically located in a mechanical equipment rooms.
Each type of refrigerant used in a chiller compressor has specific safety requirements for leak detection and emergency ventilation. Consult your local mechanical code or the International Mechanical Code for details.
The EPA has enacted regulations regarding the use and handling of refrigerants to comply with the Clean Air Act of 1990.
All personnel working with refrigerants covered by this act must be appropriately licensed.
Best Practices for Efficient Operation
The following best practices can improve chiller performance and reduce operating costs:
Operate multiple chillers for peak efficiency:
Plants with two or more chillers can save energy by matching the building loads to the most efficient combination of one or more chillers.
In general, the most efficient chiller should be first one used.
Raise chilled-water temperature:
An increase in the temperature of the chilled water supplied to the building’s air handlers will improve its efficiency.
Establish a chilled-water reset schedule. A reset schedule can typically adjust the chilled-water temperature as the outside-air temperature changes.
On a centrifugal chiller, increasing the temperature of chilled water supply by 2–3°F will reduce chiller energy use 3–5%.
Reduce condenser water temperature:
Reducing the temperature of the water returning from the cooling tower to the chiller condenser by 2–3°F will reduce chiller energy use 2–3%.
The temperature setpoint for the water leaving the cooling tower should be as low as the chiller manufacturer will allow for water entering the condenser.
The actual leaving tower water temperature may be limited by the ambient wet bulb temperature.
Purge air from refrigerant:
Air trapped in the refrigerant loop increases pressure at the compressor discharge.
This increases the work required from the compressor. Newer chillers have automatic air purgers that have run-time meters.
Daily or weekly tracking of run time will show if a leak has developed that permits air to enter the system.
Optimize free cooling:
If your system has a chiller bypass and heat exchanger, known as awater-side economizer, it should be used to serve process loads during the winter season.
The water-side economizer produces chilled water without running the chiller.
Condenser water circulates through the cooling tower to reject heat, and then goes to a heat exchanger (bypassing the chiller) where the water is cooled sufficiently to meet the cooling loads.
Verify Performance of hot-gas bypass and unloader:
These are most commonly found on reciprocating compressors to control capacity. Make sure they operate properly.
Maintain refrigerant level:
To maintain a chiller's efficiency, check the refrigerant sight-glass and the superheat and subcooling temperature readings, and compare them to the manufacturer’s requirements.
Both low-level and high-level refrigerant conditions can be detected this way.
Either condition reduces a chiller’s capacity and efficiency.
Maintain a daily log:
Chiller O&M best practices begin with maintaining a daily log of temperatures, fluid levels, pressures, flow rates, and motor amperage.
Taken together, these readings serve as a valuable baseline reference for operating the system and troubleshooting problems.
Many newer chillers automatically save logs of these measurements in their on-board control system, which may be able to communicate directly with the DDC system.
Below is an example of a daily log that can be adapted for use with your chiller.
Sample Operating Log for Chillers
Best Practices for Maintenance
Compared to a major chiller failure, a sound preventive and predictive maintenance program is a minor cost.
Implementing a best-practice maintenance plan will save money over the life of the chiller and ensure longer chiller life.
Substandard operating practices frequently go unnoticed and become the accepted norm.
Training personnel in both maintenance and operating practices is the best prevention. Many chiller manufacturers offer training for building operating engineers in operating and maintaining their chillers.
To effectively maintain chillers, you must 1) bring the chiller to peak efficiency, and 2) maintain that peak efficiency. There are some basic steps that facilities professionals can take to make sure their chillers are being maintained properly. Below are some of the key practices.
Reduce Scale or Fouling
Failure of the heat exchanger tubes is costly and disruptive.
The evaporator and condenser tube bundles collect mineral and sludge deposits from the water.
Scale buildup promotes corrosion that can lead to the failure of the tube wall. Scale buildup also insulates the tubes in the heat exchanger reducing the efficiency of the chiller.
There are two main preventive actions:
Checking water treatment:
Checking the water treatment of the condenser-water open loop weekly will reduce the frequency of condenser tube cleaning and the possibility of a tube failure.
Checking the water treatment of the chilled-water closed loop monthly will reduce the frequency of evaporator tube cleaning and the possibility of a tube failure.
Inspecting and cleaning tubes:
The tubes in the evaporator and condenser bundles should be inspected once a year, typically when the chiller is taken offline for winterizing. Alternately, for systems that operate all year to meet process loads, tube scaling and fouling can be monitored by logging pressure drop across the condenser and evaporator bundles.
An increase in pressure from the inlet to the outlet of 3–4 PSI indicates a probable increase in scale or fouling requiring tube cleaning.
Inspect for Refrigerant Leaks
If possible, monitor the air-purge run timer. Excessive or increased air-purge time may indicate a refrigerant leak.
If an air-purge device is not installed, bubbles in the refrigerant sight-glass may also indicate refrigerant leak. Gas analyzers can also be used to identify refrigerant leaks.
The table below provides a checklist for maintenance task
Maintenance Schedule for Chillers
Description Comments Maintenance Frequency
Fill out daily log Check all setpoints for proper setting and function.
Make sure there are no unusual sounds and the space temperature is acceptable.
Daily (4x)
Chiller use/sequencing Turn off or sequence unnecessary chillers
Daily
Check chilled water reset settings and function
Check settings for approved sequence of operation at the beginning of each cooling season
Annually
Check chiller lockout setpoint
Check settings for approved sequence of operation at the beginning of each cooling season
Annually
Clean evaporator and condenser tubes Indicated when pressure drop across the barrel (tube bundle) exceeds manufacturer's recommendations, but at least annually.
Annually
Verify motor amperage load limit Motor amperage should not exceed manufacturer's specification Annually
Compressor motor and assembly
Conduct vibration analysis:
Check all alignments to specifications.
Check all seals. Lubricate where necessary. Annually
Compressor oil system
Perform analysis on oil and filter.
Change if necessary.
Check oil pump and seals Check oil heater and thermostat Check all strainers, valves, etc.
Annually
Electrical connections
Check all electrical connections and terminals for full contact and tightness
Annually
Check refrigerant condition
Add refrigerant if low.
Record amounts and address leakage problems.
Annually
Check for condenser and evaporator tube corrosion and clean as needed. Indications include: poor water quality, excessive fouling, and age of chiller.
Eddy current testing may be done to assess tube condition.
As needed
SODIUM SULPHITE BASED
WATER TREATMENT PROGRAM
FOR
CLOSED CHILLED WATER SYSTEMS
CHEMICAL TREATMENT
When a new system is filled with domestic water, the hardness salts are
precipitated evenly on the system piping, and the dissolved oxygen is consumed by
local corrosion, thus leaving only inert nitrogen in the system.
In this perfectly closed
state, the water in the system will not cause further scale formation or corrosion.
However, since the system can not be a perfectly closed one in reality, sodium
sulphite is added as an oxygen scavenger such that a residual concentration of 50-
100 ppm SO3 is maintained, and sodium hydroxide (ie., caustic) is added as
required in order to elevate the pH level to within its control range of 8.5-9.5 (Note:
corrosion of copper material is excessive at pH levels greater than 9.5;
corrosion of iron material is excessive at pH levels less than 8.5).
A catalyst
solution consisting of cobaltous chloride is also added at a rate of 20 ml per pound
of sulphite in order to increase the reaction rate between the sulphite and the
dissolved oxygen at the lower temperature of these systems.
In addition to being an oxygen scavenger, the sodium sulphite will react with iron &
copper in the system to form black iron magnetite & cupric oxide, respectively.
These two materials will offer moderate corrosion protection for the system, but if air
is constantly entering the system, they will be sacrificed, the underlying metal will
corrode, and the sulphite consumption will increase, thus causing the TDS
concentration to increase, the pH level to increase, and the water in the system to
become corrosive.
The addition of a dispersing agent such as sodium hexameta phosphate to the
system is not recommended because although it is capable of maintaining
hardness salts in solution in its poly phosphate form, the alkalinity in the water in the
system will convert it either to the phosphoric acid form which will cause corrosion,
or to the ortho phosphate form which will precipitate the hardness salts.
Also, the
phosphate will precipitate the cobalt in the catalyst, thus making it ineffective.
Chemical treatment can not correct the problems associated with continuous
hardness & air ingression into the system.
Chemical treatment can only provide a
certain amount of temporary insurance against the effects of these contaminants
should they temporarily gain entrance to the system.
Therefore, under normal
operation, if the operations & maintenance activities referred to previously are
diligently carried out, only very small amounts of chemicals, or maybe none at all,
are required in order to maintain their residual concentrations after the initial charge
has been added.
Based on a generally acceptable maximum make-up water rate of 0.1% of the
system capacity per day, the "rule-of-thumb" maximum acceptable sodium sulphite
addition rate in grams/month is equivalent to 2% of the system capacity in imperial
gallons.
4=ع74That is, if the system capacity is 1,000 imperial gallons, the maximum
acceptable sodium sulphite addition rate would be 20 grams/month. If the sulphite
consumption is greater than this amount, excessive air is entering the system.
CONTROL TESTS
In order to minimize fouling and/or corrosion of these systems, the following control
tests must be performed:
1. Document the make-up water meter reading at least once per
month (see record sheet overleaf).
2. Determine & document the sulphite concentration in the
system at least once per month (see record sheet & test
procedure overleaf).
3. Determine & document the pH level in the system at least
once per month (see record sheet & test procedure
overleaf).
4. Determine & document the TDS (or conductivity) level in the
system at least once every 3 months (see record sheet &
test procedure overleaf).
5. Determine & document the visual appearance of the water in
the system at least once per month (see record sheet
overleaf).
6. Document the system pressure at the circulating pumps with
the circulating pumps shut off (see record sheet overleaf).
7. Replace the by-pass filter cartridge when the flow
indicator shows a reduced flow and document this activity
WATER TEST PROCEDURES
SAMPLE COLLECTION
The purpose of sampling is to obtain for analysis a portion of the main body of water
that is truly representative.
The most critical factors necessary to achieve this are:
- point(s) of sampling;
- time of sampling;
- frequency of sampling;
- maintenance of sample integrity prior to analysis.
The sample point must be remote from excessive amounts of particulate matter,
incoming feed or make-up water, and chemical feed points.
Samples must be collected during normal operation prior to chemical dosing.
The frequency of sampling is determined by the amount of deviation of the control
parameters from their control limits.
Before collecting a sample, establish a flow of not less than 500 ml/min for a
minimum purge period of 10-15 seconds for every foot of sample line.
Fill the sample bottle completely, allowing no air space at the top of the bottle.
Samples must be analyzed as soon as possible after they have been collected.
DETERMINATION OF SULPHITE CONCENTRATION
1. Pour 50 ml of unfiltered sample into a clean casserole
dish;
2. Add 1 ml of hydrochloric acid, 50% (SB-302) & stir gently;
3. Add 0.2 grams of starch indicator (S Ind-303) & stir
gently;
4. Immediately titrate with potassium iodide-iodate, 0.0125N
(ST-301), while gently stirring the sample, until the first
appearance of a persistent blue colour appears in the
sample;
5. calculate the sulphite concentration as follows:
sulphite (as ppm SO3) = 10 X ml of ST-301 used.
DETERMINATION OF pH LEVEL
1. Calibrate the pH meter by using buffer solutions of known
pH values which are close to the expected sample pH level;
2. Rinse off the pH meter electrodes with a portion of the
sample;
3. Immerse the pH meter electrodes into a fresh sample and
read off the meter reading within 1 minute.
DETERMINATION OF TDS CONCENTRATION
1. Rinse off the TDS meter electrodes with a portion of the
sample;
2. Immerse the TDS meter electrodes into a fresh sample and
read off the meter reading.
TROUBLE SHOOTING GUIDE
Symptoms Possible Cause Remedy
Sulphite concentration is less Insufficient sodium sulphite has Add sodium sulphite.
than 50 ppm SO3. been added.
Excess air is entering the Refer to O & M.
system.
Sulphite concentration is Too much sodium sulphite has Do not blow down the
greater than 100 ppm SO3. been added.
system.
pH level is less than 8.5. Insufficient caustic has been Add caustic in small amounts
added. at a time.
Corrosive bacteria are present. Contact Consultant.
pH level is greater than 9.5. Too much caustic has been Drain the system, fill with
added.
fresh treated water.
Too much sodium sulphite has Eliminate air ingression into
been added.
the system.
TDS concentration is greater Too much make-up water and Drain the system, fill with
than 2000 ppm. too much sodium sulphite fresh treated water.
have been added.
Black sediment is present in There is active corrosion in the Replace filter cartridge.
the system. system. Refer to O & M.
Hardness deposits and/or Too much make-up water has Remove deposits by a
corrosion products are present.
been added and there is active chemical cleaning operation.
corrosion in the system.
| |
|
















![[MSF+3.jpg]](https://2img.net/h/4.bp.blogspot.com/_SynCnHGx75g/Shl2T3oVhsI/AAAAAAAAAEY/_7oem5pvQ3I/s1600/MSF%2B3.jpg)

